
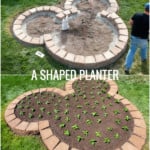


Love Disney? Want to bring some DIY Disney style landscaping to your yard? We’ll show you how to build this Mickey Mouse shaped flower bed planter for your favorite annuals!
Fellow Disney lovers will also love our collection of Disney ornaments, matching family shirts for your Disney trip, and check out our all about Disney Instagram channel, too.
Watch the video above to see how you can build your own DIY Disney flower bed (shaped like Mickey Mouse) in a weekend!

This post contains affiliate links. Learn more and read our full disclosure policy here.
DIY Mickey Mouse Shaped Flower Bed Planter
We are big fans of Disney. And my parents are, too — they really raised me right!
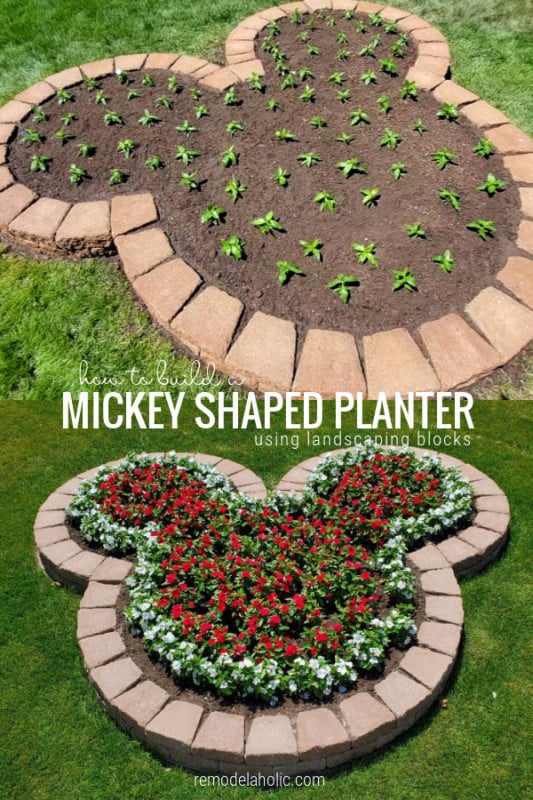
To bring a little bit of our happiest place on earth home with us, we built this Mickey Mouse planter/flower bed for my mom.
As a pro landscaper (in a previous life), I wanted to make sure this raised flower bed was going to be durable.
This planter is built with stone landscaping blocks set on a bed of concrete footing so it is solid and going to last for many years.
Get the detailed planter diagrams and materials list in our printable project plans HERE.
Flower Bed Dimensions
The finished Mickey Mouse flower bed is 12’-0” tall by 10’-4 ½” wide.
The raised bed holds approximately 2 cubic yards of soil.
The total flower bed surface area (for calculating the amount of flowers) is 60 square feet. We first planted about 90 flowers, then filled in with about 90 more to really amp up the color.

How to Create a Concrete Base for a Stone Flower Bed
Making your own planter, whether you’re a Disney fanatic or not, is a great way do your own landscaping and add curb appeal.
No matter what shape of flower bed or raised planter you build, you can use the same process we showed in the video to give it a strong foundation.
If you are comfortable working with concrete, you could mix and pour the concrete foundation like we did for our fire pit a few years ago.
Or if you’re using landscape blocks to build a planter along the edge of an already poured concrete slab (like we did with this retaining wall flower bed) — that works, too.

But for this Disney themed raised planter, we used dry quick concrete mix to create a custom shaped flower bed.
Use the dry mix makes it easier to make the custom round shape, and saves the stress of working with mixed concrete (which we’ve done plenty of when we poured this entire patio on our own!)
Watch the video to see how we set the blocks using dry concrete. It’s a great trick for making a durable flower bed edging of any shape or size you want!

How to Build a Round Flower Bed with Landscape Blocks
Building your own flower bed using affordable landscape blocks as edging is a great way to add curb appeal to your home or create a really welcoming and well-planned backyard area.
Read more: How to Create a Dreamy Backyard
Laying landscape blocks is really easy, so you don’t need to be an experienced landscaper — this is a great beginner do it yourself! #remodelaholic
These steps, plus additional diagrams and dimensions, are included in the printable project plans HERE.
- Start by prepping the area. Use marking spray paint to mark the area, then dig out the grass and level the soil.
- For a round flower bed, the rebar and rope trick I show in the video really helps you mark a perfect circle!
- Install no-dig edging around planter area.

- Lay a base layer of dry quick concrete mix (like we show in the video).
- Lay the first layer of landscape block on top of the dry concrete mix.
- Lay the second layer of landscape block on top of the first row, staggering the blocks for stability.
- If you need to split landscape blocks, watch the video (at about 6:10) to see our easy method using a block chisel!
- When all the blocks are in the right spot, attach the second layer of blocks to the first using masonry adhesive.

- Fill in the gaps between the blocks with more dry concrete mix (like shown in the video).
- After allowing the construction adhesive a day to set, mist the dry cement mix with a misting spray nozzle until all of the mix has been moistened. Allow it to cure.
- Add your soil and flowers (and plant fertilizer) and wait for them to grow!
Increase your curb appeal with these 25 DIY Curb Appeal Ideas.
Ready to build your Mickey Mouse Planter Bed? Click here to add the plans to your cart and checkout.

Tips for Planting a Shaped Flower Bed
- If you want to emphasize the shape of your flower bed (like we did), plant shorter flowers that are all the same height, and group them by color.
- To really make the shape of the planter show up and shine, we bordered the planter with white flowers and filled the center with red.
- About a month after planting, we realized we needed more flowers. We added ours so they were spaced about half as close as the planting recommendation.
- Check the PH of your soil with a soil test kit before planting so you can match your flowers to your soil and augment the soil as needed.
- Match your flowers to your sun/shade, too. Our planter is in full sun, so the dark red and white polka dot vincas we planted have really thrived.
- After the summer annuals have faded, you can add mums or other fall plants for fall landscaping.

More gardening and landscaping tips you’ll love:
Be sure to pin this for later and subscribe to our YouTube channel to see our new projects.
About Cass
[ad_2]
Source link