
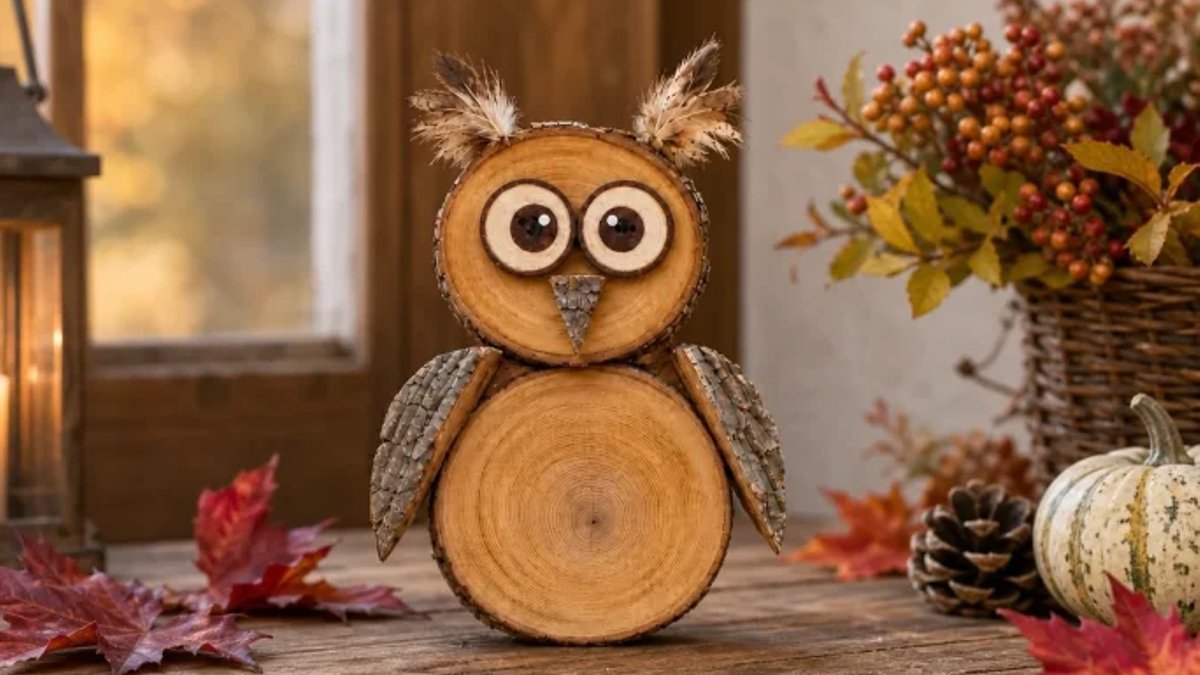
A wood slice owl can transform leftover materials into a standout fall decoration in just 30 minutes, combining rustic appeal with painted details that draw attention.
Materials and Preparation
The essential components include two dry wood slices with bark still attached, long narrow bark pieces for wings, and a small triangular bark section for the beak. A body slice measuring 6 to 7 inches pairs well with a 4 to 5 inch head slice, though proportions should be adjusted to visual preference.
Additional supplies comprise four large dark brown buttons with four holes, craft feathers in brown and beige, acrylic paint in cream, dark brown, and white, a fine brush, and a hot glue gun with sticks. An optional flat wood scrap serves as a back brace for stability.
Paint the button eyes first by applying a cream ring around each dark button, leaving a narrow dark edge and brown center pupil. Add a small white dot to each pupil for lifelike gaze. Let painted eyes dry completely before gluing.
Lay out all pieces on a work surface without glue. Position buttons side by side on the head area, angle wings downward along the body, and ensure contact surfaces are free of loose bark crumbs for proper adhesion.
Assembly Process
Position the smaller head slice above the larger body slice, overlapping edges slightly. Apply glue to contact surfaces and hold until cooled. Reinforce with a wood scrap brace if the contact area is small.
Read Also: Crafters Create Natural Owls From Pampas Grass
Attach wings by gluing long bark pieces to the body sides, rough bark facing outward. Place the triangular beak piece centrally on the head’s lower half, pointing downward with space above for eyes. After eyes dry, test their placement before securing with glue just above the beak.
Create feather tufts and attach one to each side of the head top, working from behind to minimize visible glue lines. Allow all joints to cool completely. The owl’s rustic appearance comes from the untreated wood, while the painted eyes and soft feather tufts give it a surprisingly lifelike charm.
The finished piece can sit happily next to a pot of mums by the front door or on the mantel, adapting to different indoor and outdoor spaces.
Finishing Touches and Placement
Three suitable locations exist for displaying the wood slice owl, each highlighting different aspects of its autumn appeal. Moving the owl requires handling the body section, never the head, wings, or feathers.
Display Options
Next to a terracotta pot of chrysanthemums and a smaller pot of heather creates a warm display. Cream and rust-colored blooms complement the wood’s natural tones, while scattered red-green maple leaves add seasonal accents. Indoors, the figure looks cozy beside a ceramic vase of fall branches and two small pumpkins in white and sage green.
Leaving open space in front of the face allows the button eyes to stand out prominently. The images in this article were generated with the most advanced AI models and are 100% true to reality.


